Getting Started: Your First-Time Setup
Welcome, creator! This guide will walk you through the essential first steps to get your account and Discord bot up and running. The process is designed to be secure and straightforward.
Step 1: The Desktop Sync App
Your journey begins with our secure desktop application. This app is the key to creating your dashboard account because it handles the initial connection to your Fansly profile locally on your computer, meaning your sensitive auth token never leaves your machine.
Download the App:
- Recommended Method: Go to the Login Page. The page will automatically detect your operating system (Windows, macOS, or Linux) and provide the correct download button for you.
- Manual Method: You can also download the app directly from our GitHub Releases Page.
Enter Your Auth Token: Once installed, open the app and paste in your Fansly Authorization Token. See the easy method below for getting this token.
Fetch Data: Click “Fetch Data”. The app will connect to Fansly and confirm your profile details.
Create Account: Once your data is fetched, click “Create / Link Account”. This will securely create your unique credentials for the web dashboard.
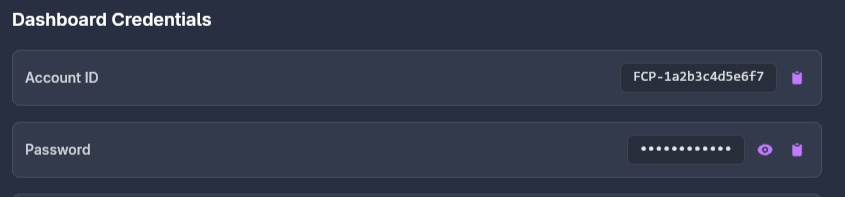
Your Credentials: The app will display your Account ID and a temporary Password. Copy these and keep them safe! You will use these to log into the web dashboard.
A Note on Security & Trust
We understand that your account's security is paramount. That's why the "NotiFansly Account Manager" desktop app is fully open-source. You can view the entire source code on GitHub to verify that your auth token is only used to communicate directly with Fansly and is never sent to our servers or stored anywhere but on your own computer.
How to Get Your Fansly Auth Token (Easy Method)
This is the fastest and most reliable way to get your token.
- Go to fansly.com, log in, and open your browser’s developer tools (usually by pressing F12, or Ctrl+Shift+I).
- Click on the “Console” tab.
- Copy and paste the entire code block below into the console, then press Enter.
console.clear();
const activeSession = localStorage.getItem("session_active_session");
const { token } = JSON.parse(activeSession);
console.log('%c➡️ Authorization_Token:', 'font-size: 14px; color: #8B5CF6; font-weight: bold;', token);
The console will print out your Authorization_Token. Copy the long string of characters and paste it into the desktop app.
Warning: Your Authorization Token provides full access to your account. Never share it with anyone.
Step 2: Log In and Connect Discord
With your new credentials, it’s time to set up the web dashboard.
- Log In: Go to the main website and log in using the Account ID and Password from the desktop app.
- Go to the Discord Bot Page: In the dashboard sidebar, click on “Discord Bot”.
- Connect Your Discord: You’ll see a large “Connect Discord” button. Click it to begin the secure authorization process with Discord. You will be asked to grant the bot permission to see your servers.
Step 3: Configure Your Server
Once your Discord is connected, the dashboard will show a list of servers where both you and the bot are present.
- Select a Server: Click on the server you want to configure.
- Enable the Bot: The first and most important setting is the master “Bot Status” toggle. Switch it on to make the bot active in that server.
- Important: You can only have the bot fully active in one server at a time. Activating it in a new server will automatically deactivate it in the old one.
- Set Your Primary Server: It’s recommended to set your main community server as “Primary”. This gives it a star and helps with future features.
Step 4: Configure Notifications & Roles
Now for the fun part! Customize how the bot works in your server.
- Post & Livestream Notifications: Enable these toggles and choose which channel you want the announcements to go to. You can also select an optional role to ping (like
@Subscribers). - Live Stream Image: Upload a temporary “Coming Soon” or “I’m Live!” image that will be used for your next livestream notification. This is a great way to add a personal touch.
- Role Linking: This is a powerful feature.
- Subscriber Role: Select the role you want all your Fansly subscribers to get automatically when they link their accounts.
- Follower Role: Select the role for your Fansly followers.
- Tier-Based Roles: For ultimate customization, you can map specific Discord roles to your individual Fansly subscription tiers.
Once you’re done, hit “Save Configuration” at the bottom.
Step 5: Invite Your Fans to Link!
Your bot is now ready! The final step is to let your fans know they can get their special roles by linking their accounts.
- You can make an announcement telling them to use the
/linkcommand in any channel. - For a detailed walkthrough you can send them, check out our Fan Linking Guide.
And that’s it! Your automated community engagement system is now active.